

LEFT: Eyelet Board hand-wired construction / RIGHT: PCB hand-assembly construction
I hear a lot about the debate between PCB's and "hand-wired" eyelet or turret board construction. So I thought I would give you some real info, and fill you in on fact v. fiction. For starters, what are these things? Well, every amplifier has electronic circuits. They are made up of resistors and capacitors (and a few other electronic components). Rs&Cs go into the circuit such that the electronic signal passes through the R or C and gets altered. Hence, they go "in line" much the same way that water passes through a water filter before making it out of the faucet. But there's a fair number of them in line in your amplifier so there has to be some way to connect them all together. There's basically 4 ways to do it.
1) PCB (Printed Circuit Board). Here, the designer/engineer has laid out the circuit in the desired manner. The "traces" are like your wire that connects everything (the water supply line) and there are holes where all the components go so that they go in the exact same place every time. See Image 1 (A).
2) Hand-wired (no board of any kind). Here you see a lot of wire tying everything together with all the necessary components cut in where they go. It is very time consuming, but essentially the wires take the place of the "traces" on a PCB, which are the same as the wires, but laminated inside the board. Hand-wired can look a bit like spaghetti. See Image 1 (B).
3) Eyelet or Turret Board. This is a "board" with eyelets down each side (holes) that you can place the components in, then connect them together directly, or use wire on the underside of the board to do so. A "turret" board simply replaces the eyelets with "turrets" that stand up off the board instead of the thru-hole eyelets. See Image 1 (C) Eyelet (D) Turret.
4) Breadboard. If you're old enough, you may remember "Lite-Brite" kits. Well, that's a breadboard. If not, it's a bunch of holes that you can use to "layout" your circuit. It's really used for prototyping and never used for stable, long-use production. See Image 2.
cont. . .
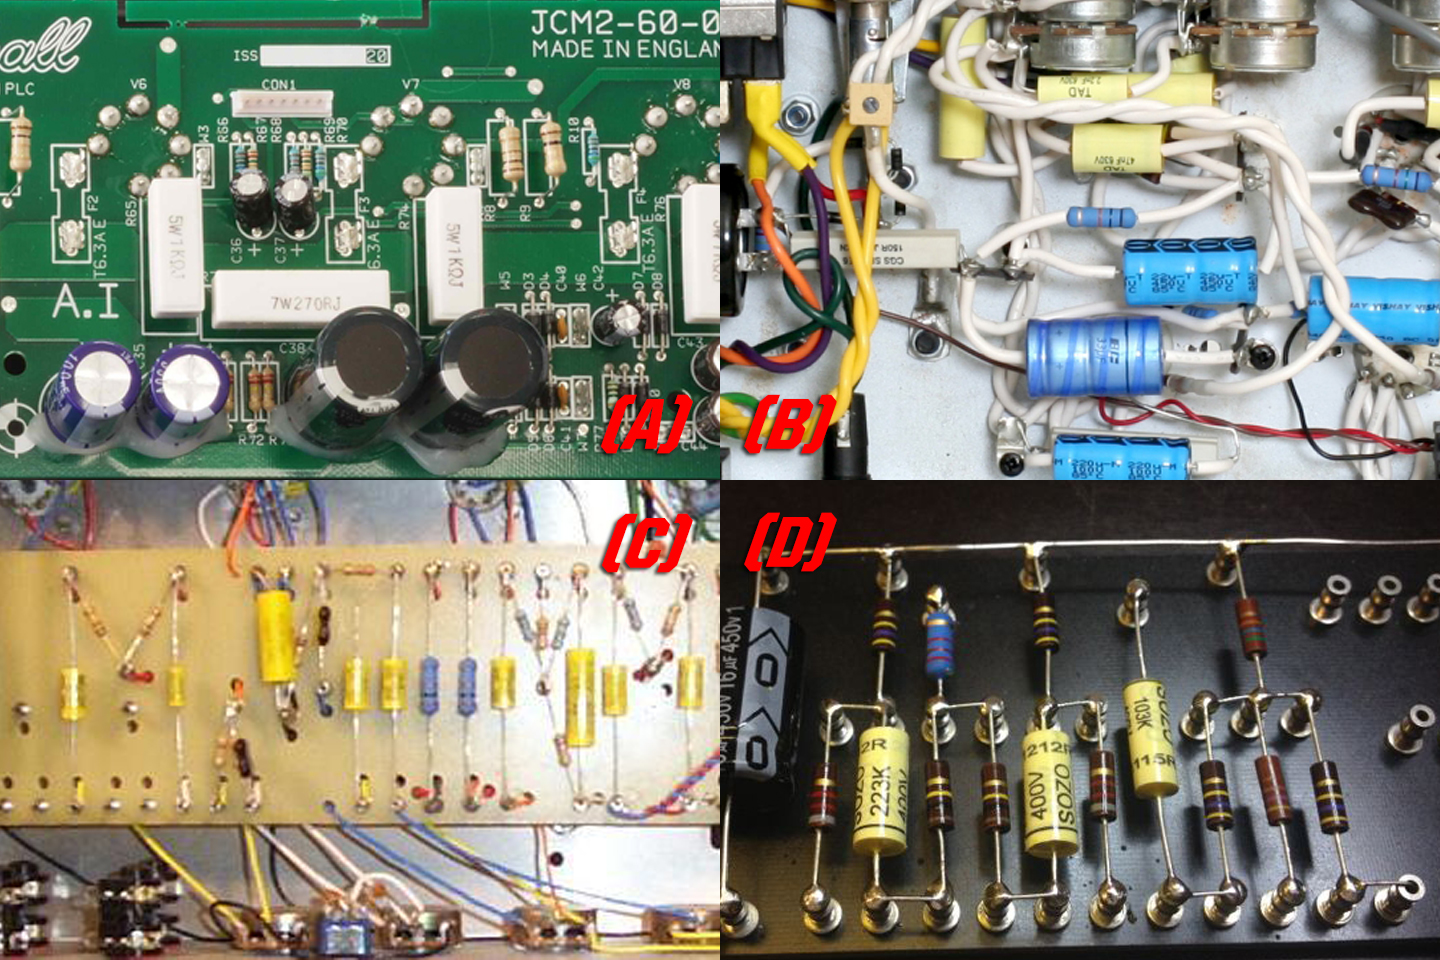
Image 1. (A) PCB, (B) Hand-wired, (C) Eyelet board, (D) Turret board
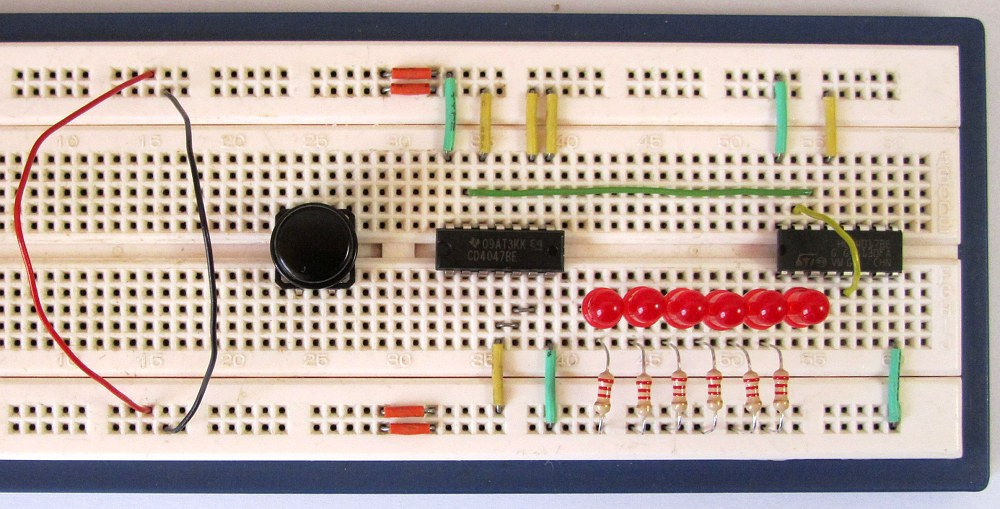
Image 2 - Prototyping Breadboard
Why do amp designers choose 1 over the others? Oh, who knows. But here's the general reasons. Let's start with PCB's. In the old days, PCB's weren't around. Ok, so skip that one. But now they are. Why use it? Advantages: Well, if you make more than a few, it cuts the assembly time down immeasurably. Second, it is FAR FAR FAR more stable long-term. It creates a tested platform that is stable and ensures everything goes exactly where it needs to, every time. Further, it radically limits the margin for assembly error. If you leave a component out, you can see it by simple glance at the board. Further, it radically limits the probability of bad solder joints, wires that become disconnected, etc. Drawback? Well, there's some engineering involved. You have to know how to lay it out, program it in and then they have to be tested for trace proximity causing noise, oscillation etc. You have to know the size traces to use, construction method etc. Many people don't. So they're scared of it, or are a smaller designer and don't have the time or available tools to do it.
Next to fully hand-wired. Advantages: Only the voodoo that there seems to still be some mysterious allure to "hand-wired" amongst guitar players as if they sound better because someone did it all by hand. In the end, it's the same components, same circuit. If I do the job correctly as hand-wired, and did my job correctly on a PCB, there will NOT be any sonic difference. Let me say that again, there will NOT be any sonic difference. It's like making a guitar body - on a CNC, they're the same every time. By hand, it can be the same, but either way, the guitar isn't going to sound better if you took 3x longer to cut it by hand, provided it's the same quality wood, etc. I had to buy a new mattress the other day. I found 2 identical ones. Same construction, coils, etc. One was $1000 more. I asked why. They said it was "hand-made," as if THAT is important in a bed. People used to think that the hand-wired nature of amps is why they had such sonic differences, even among models. Essentially, the thought was that old-school Marshalls sounded different from amp to amp of the same model because they were hand-wired. Well, no. In those days, you couldn't find components with much less than about 10% tolerance. If you have 2 and one is 10% higher and the other is 10% lower, you have a 20% difference. Nowadays, we can get 1% components. So the sonic variance is much less. Drawbacks: Takes forever to make it, thereby increasing cost due to radically increased time. As well, it significantly ups the margin for assembly error.
Eyelet/Turret Boards. Kind of a nice middle ground in a way. You sort of shorten the time involved. You sort of reduce the margin for error. But they are not good for more complicated assemblies, which is true for nearly every channel changing amp. Since they lay out in a line, on more complicated builds you may have a railroad tie-sized 2-channel amp. LOL.
So here's the real deal. NONE of these methods will make your amp sound better or worse on their own. What does make it sound better or worse is a few things and only a couple of them have anything to do with the assembly method. Here's a non-exhaustive list:
1) Um, circuit design and transformers. That's number 1) for a reason.
2) The quality of the components. Nothing to do with assembly methods. You can use good or not-good components on any of these assembly methods.
3) Was it put together properly. Well, this can be greatly affected by the assembly method.
4) Did the designer layout the assembly or PCB correctly.
What is the best choice? Well it depends. At Diamond, we use the PCB because we've tested and tested and tested our designs. And they've had MASSIVE road testing. So we KNOW it's stable and it reduced assembly time as well. If we were only making a few, we probably wouldn't spend the extra R&D time to develop the PCB and just go hand-wired. But by only a few, I mean like 10. Anything more, develop the PCB. We've chosen eyelet boards on some of our older Class A more vintage designs, but they were simple, low-wattage amps that didn't require as much, so we used the eyelet boards and had to put everything through extra testing to avoid field failures.
What's the best choice for you? Well, the one that sounds best in your rig, but also one that has a track record for reliability, and most hand-wired amps do not (some do, however so it's not a universal rule). Do not choose your amp on the assembly method, or even be swayed by it. It will make no difference to your ear or the ears of your many fans. Choose on sound, then reliability. Just about everything else has more affect on your amp's tone than the assembly method.
Hope this helps.


